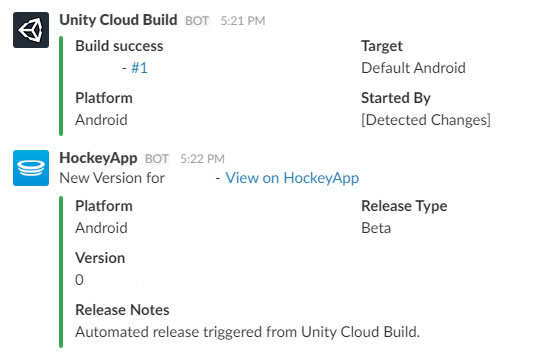

As you can see, less than seller. But not surprising, as Teams doesn't know how to interpret and display generic web hooks, as they all come in different shapes and sizes. Microsoft expects third parties to create custom connectors. Microsoft's next generation of HockeyApp (Mobile Center) has a connector on the roadmap, but nothing is expected to be done with HockeyApp.
To solve this problem, we need an intermediate interpreter that can take the content of our web hook and translate it into something that Microsoft Teams can understand and display. This can be achieved with a tool like Microsoft Flow and can be split down into three stages
- Accept the contents of the incoming web hook
- Translate
- Send to Microsoft Teams
Setting up an Incoming web hook
First thing we need to do is set up an end point within Flow that HockeyApp can post our web hook notification to. Within the Triggers section, look for the trigger Request/Response - Request.Once we've selected this trigger, we will need to tell Flow how to interpret the results so that it can use them later on in the flow. This can be done either by uploading a schema or by uploading an example response. For HockeyApp, we can get an example of the payload from their web hook tutorial, where we'll be using the payload of Version Released. Once uploaded, our result should look like the following.

An incoming web hook URL wont be generated until we've saved our flow, so we'll come back to this at the end.
Translating
Once Flow has received our incoming web hook, we'll want to translate the results into a nicely formatted message to send to Teams. This can be done by adding an action following on from our trigger called Data Operations - Compose. Within the input field, we can then format our web hook input into something more informative using the provided data. We do this by adding Dynamic Content to our input, which is available as an overlay to the right of the action. These variables are generated from our trigger's schema and can be used in conjunction with fixed text. They're added simply by tapping the relevant variable.As our input will be used within Teams, our input will use markdown to stylise the content. I'm needing just the title, version and notes from HockeyApp, but you can include anything that is available to you. Our result should now look something like the follow.
Sending To Microsoft Teams
The final part of the puzzle is to send our formatted data to our desired channel within Teams. At the time of writing, Flow includes Teams integration directly, but there are two main problems that I have found when using it- When Flow posts the data to Teams, it is posted on behalf of your account. This just looks odd to other users and I'm not sure if you'll get notifications when Flow posts on your behalf.
- The Teams integration doesn't support markdown for some reason. As this is still in preview, this will probably be fixed before final release.

Once done, copy the URL provided with the incoming webhook; we'll need this later on. In Flow, add a final action using HTTP - HTTP. The URI field should be set to the URL generated by the Team's incoming webhook. The rest of the action should look like the following:

As you can see, we're using Dynamic Content with our body, this time pointing at our generated payload from the translating stage to determine the content to send.
Finally give the Flow a name and save it.
Final Setup
So we have our flow, but now we need to configure our service, HockeyApp, to send data to it to start the flow off. Open up the Flow we've just created and select the first trigger. Now that our Flow has been saved, a URL should be generated within the HTTP POST URL field. Click the nice copy icon to copy it to your clipboard.Once the endpoint URL has been copied, navigate to your service and setup the webhook. For HockeyApp, this can be done by following their tutorial, using the Flow URL as the target.
To test, you will either need to upload a new version to HockeyApp or use a tool like Postman to send an example payload to the URL generated by the flow. When you do either of these, you should see the new message pop up in Teams.


Thinking of engaging with your audience by sending alerts, confirmations, notifications, reminders, and SMS marketing campaigns. Business texting app USA may help you for this in an east way.
ReplyDelete